Remote Observing
Remote observing allows you to run the observatory from any computer exactly as if you were in the control room. We use TightVNC remote desktop software to access the observatory computer. Because the computer is behind USTs firewall, Off campus users will have create an SSH tunnel through the department server.
Initial Setup
If you are off campus, Set up tunneling
Set up Remote Desktop access
Set up the Webcam Software
Begin a remote observing session at the observatory
If you are off campus, start the SSH tunnel
Run TightVNC Viewer.
Enter the observatory computer’s address:
On Campus
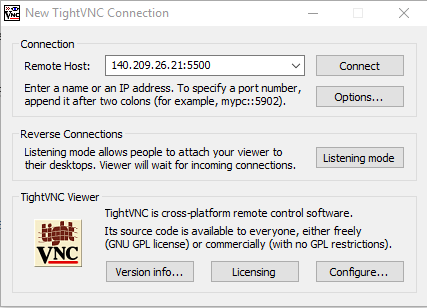
Off Campus
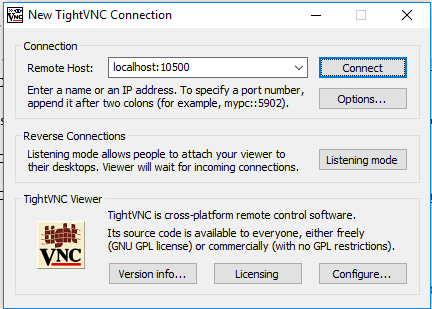
Click Connect and you should see the observatory computer desktop.
Access the Dome Webcam
If you haven’t already, set up the webcam
Start up the ReoLink client
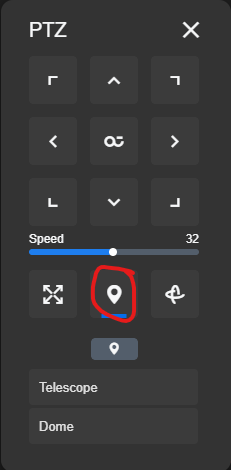
Hovering the mouse over the image brings up a menu in the lower right. Click the PTZ button to bring up the camera control dialog
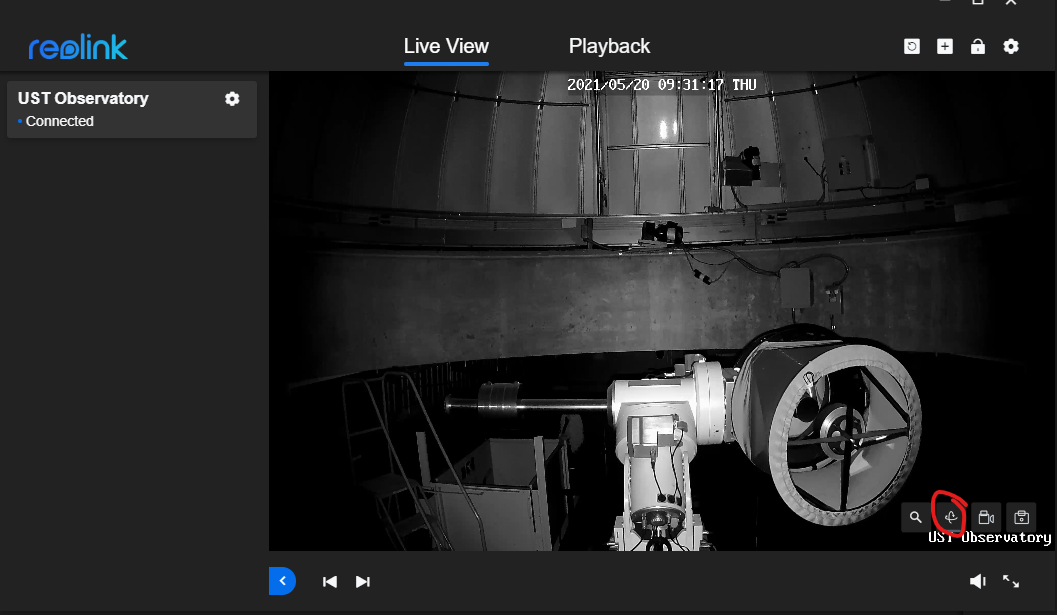
In the PTZ dialog, click the Presets button to bring up some useful preset positions
Start the SSH tunnel
If you haven’t already, set up tunneling.
Run MobaXTerm and select Tunneling from the ribbon

On the tunneling dialog, click the start button next to your observatory and webcam tunnels.

Enter your password if asked.
That’s it! Your tunnel to the observatory is running!
Set up Tunneling
Install MobaXTerm
Run MobaXTerm and select Tunneling from the ribbon
In the tunneling dialog, click the New Tunnel button

Fill in the New Tunnel dialog as shown below. In the username field, put in the username that you received from the observatory administrator.
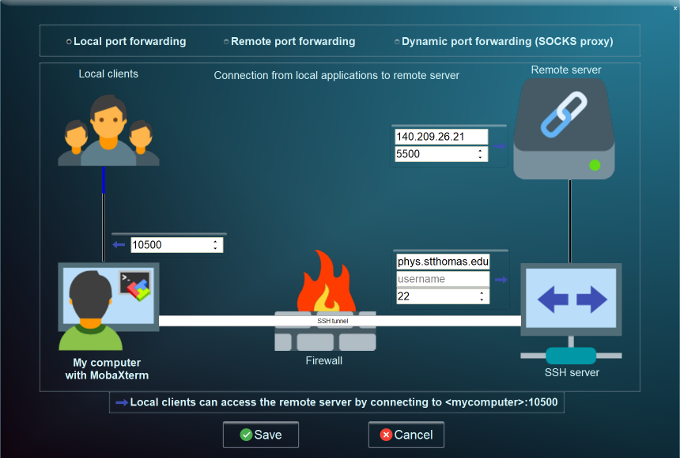
Give your new tunnel a name (like Observatory or Bob)
click the New Tunnel button again
Fill in the New Tunnel dialog as shown below. In the username field, put in the username that you received from the observatory administrator.
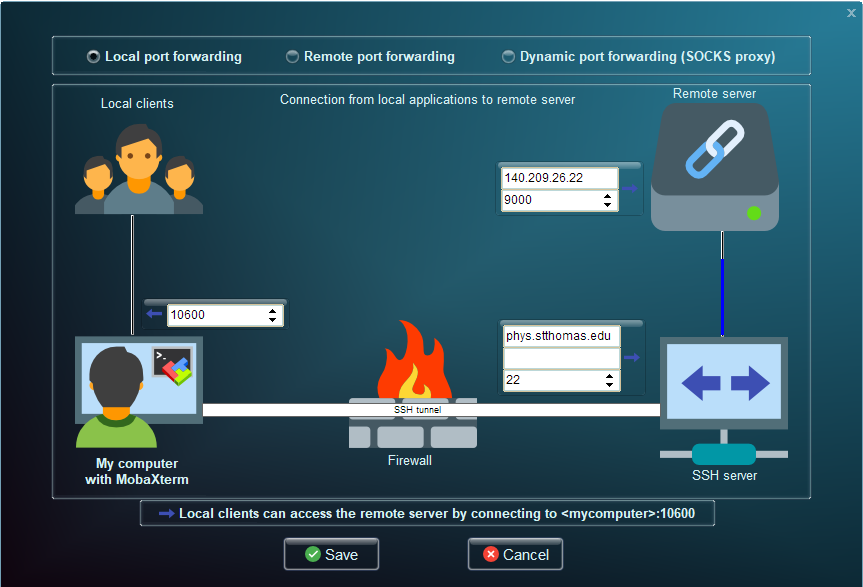
Give your new tunnel a name (like Webcam or Other Bob)
Click the Exit button.
Set up the TightVNC Viewer
Download and run the installer for TightVNC .
Accept the License Agreement
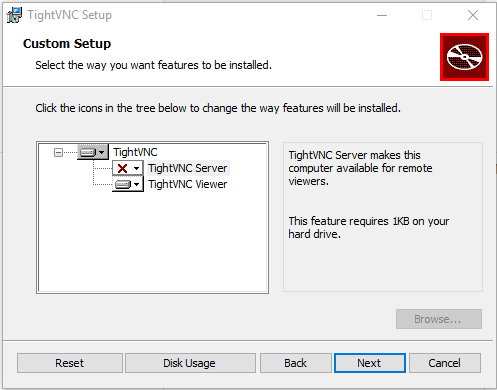
On the Choose Setup Type screen choose Custom.
On the Custom Setup screen, deselect TightVNC Server since you likely do not want to make your computer available for remote access.
Select the defaults for the rest of the installation.
TightVNC is ready to run!
Set up Webcam
Download and install the ReoLink Client
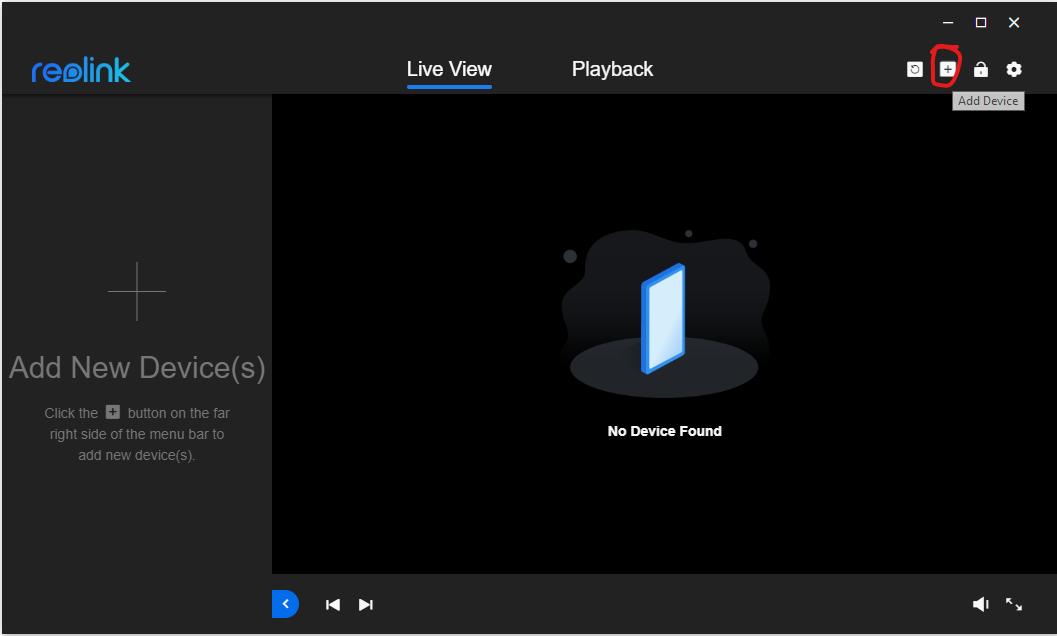
Click the Add Device button in the upper right hand corner of the Reolink window
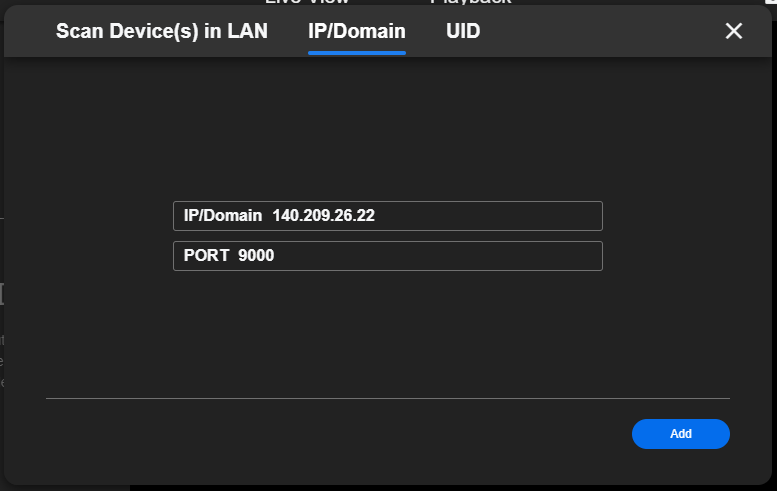
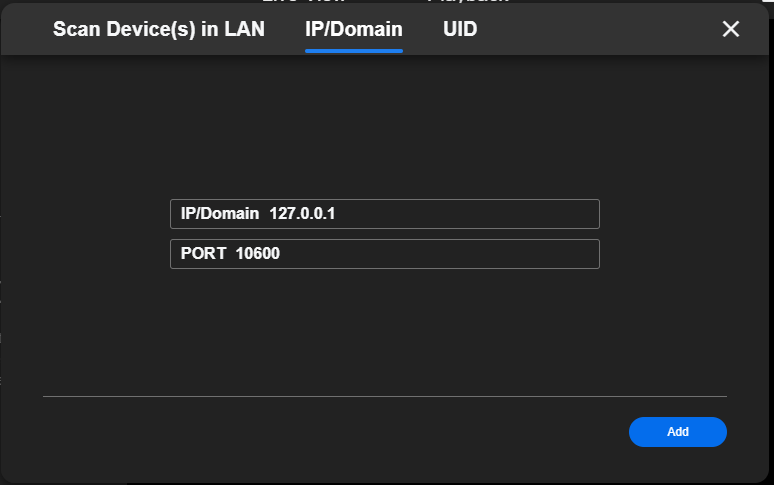
Put in the IP address and the Port and click the Add button
On Campus
Off Campus
Enter the password when prompted.